Roof Vent Installation
There are several kinds of roof vents that can be installed on your roof. Each type is different, but they all have one purpose, just like the other ventilations in your home, such as the ones in your kitchen, bathroom, or garage. They provide better circulation so that hot or cold air does not get trapped in those spaces that could cause a lot of damage.
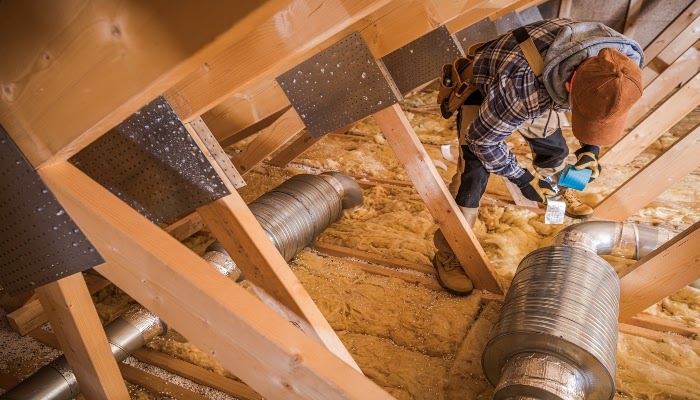
During the winter months, moist air that seeps into your roof can cause a build-up of moisture. That can start the onset of mold, mildew, and eventually the rotting of the wood that is part of the roof structure. Ice dams can also form due to the imbalance of the cold and heat.
Purpose of roof ventilation
- Extend the life of your shingles
- Prevent ice dams
- Prevent mold and mildew
- Reduce energy bills
How to install roof vents
Finding the right roof vent is determined by first determining the exact size of your roof. This will allow you or your contractor to estimate how many vents you may need based on the top’s size and the type of vents you prefer. You can find the exact measurement of your roof on the house plans or have it manually measured.
Whether you decide to install the roof vents yourself or hire professionals, it is always advisable that you know the extent of the work that will have to be done on your roof.
After getting the measurement of your roof, you will also need to calculate your attic size.
You do this by multiplying the attic’s width by its length to find the square footage of the area. If you have a 400 square foot attic, half of that will exhaust the air out, and the other will allow air in. Calculations will defer, though, if your roof’s slope is not a standard measurement, which means you will need more vents installed to make up for the additional flow space.
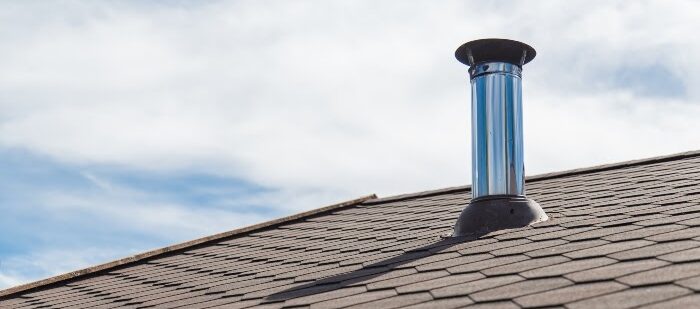
Most roofs have openings that can easily fit a roof vent. Some are fan-driven, others are powered by natural wind blowing in, while some use solar panels. Before deciding on your home’s proper vents, you need first to determine how much ventilation your home needs. Here are a few samples you can choose from and how they are installed:
Static vent installation
Static vents are installed two feet from the peak of your roof. Start by marking the area where you will be placing the static vent with a nail. The nail should be long enough to go through your roof shingles so that it can be visibly seen from the roof. The nail should be hammered between the roof beams, and the vents will be installed in the center. From the roof, remove the shingles using a clawhammer. Once removed, this is where the vents will be installed.
Next, you will need to outline where you will be cutting from the roof. You will need a circular saw to cut a square shape from the roof. Within the outline, make sure that you are only cutting through the top of the roof and not any beams. Once you have sawed out the square shape, lift the board and punch out the square.
From the roof, you can now saw through both the shingles and the roof. The static vent can now slide beneath the shingles. Use roofing caulk or tar as adhesive to keep the vents securely in place, adding nails for additional security. Now you can cover the surrounding space around the vent with shingles.
Ridge vent installation
Ridge vents are also referred to as continuous vents. They are popular because they can seamlessly appear like the shingles on your roof. Installing them requires cutting a three to four-inch hole and installing a continuous vent opening, and covering the spaces with shingles. Placed along the peaks of the roofs, these kinds of vents evenly distribute air from the roof. It allows temperatures to remain consistent. Ridge vents take longer to install than the other types due to their aesthetic design of attaching them to the roof shingles.
The costs are worth it if you want your roofs to maintain their seamless appeal. If you are installing ridge vents, you will need to start by removing the cap shingles from the peak of your roof. These are shaped like an upside-down V. A slot will need to be made on both sides of the roof peak. The ridge vents will be placed securely flat across this length section. There should already be holes on the vents, so you will just need to make sure they are secure and additional nails can be used. It is optional if you want to replace the shingles that you took out or leave them as is.
Soffit vent installation
Soffit vents and ridge vents work the same way, but they are placed on different parts of the roof. While ridge vents are placed on the roofs’ peaks, soffit vents can be seen on the roof’s eaves or the underside. Installing them would require that additional inspection be first made to ensure that all electrical wires are not in the way. After which, a hole will be drilled where the vent will be placed.
Like the soffit vents, you will need to outline a square to make way for the overhang. Holes will need to be drilled as a marker for the saw blade. After cutting out the square, this is where the soffit vent will be placed. Then allow a four feet distance between that vent and the next and so on.
Vents are part of the complete roofing system of your home, and making sure that they are correctly installed is an investment that you will not regret. With vents, you can never have too many, but not having enough is a risk that you should not take.
If you require more help, feel free to get in touch with 1-800-HANSONS, as we specialize in roofing replacement, installment, and ventilation. Click here for a free estimate.
Get a Free Estimate Today
50% off installation. Special financing available. See details.
More About
Roofing